この記事は、ギルドワークス Advent Calendar の11日目の記事です。
Amplifyとは
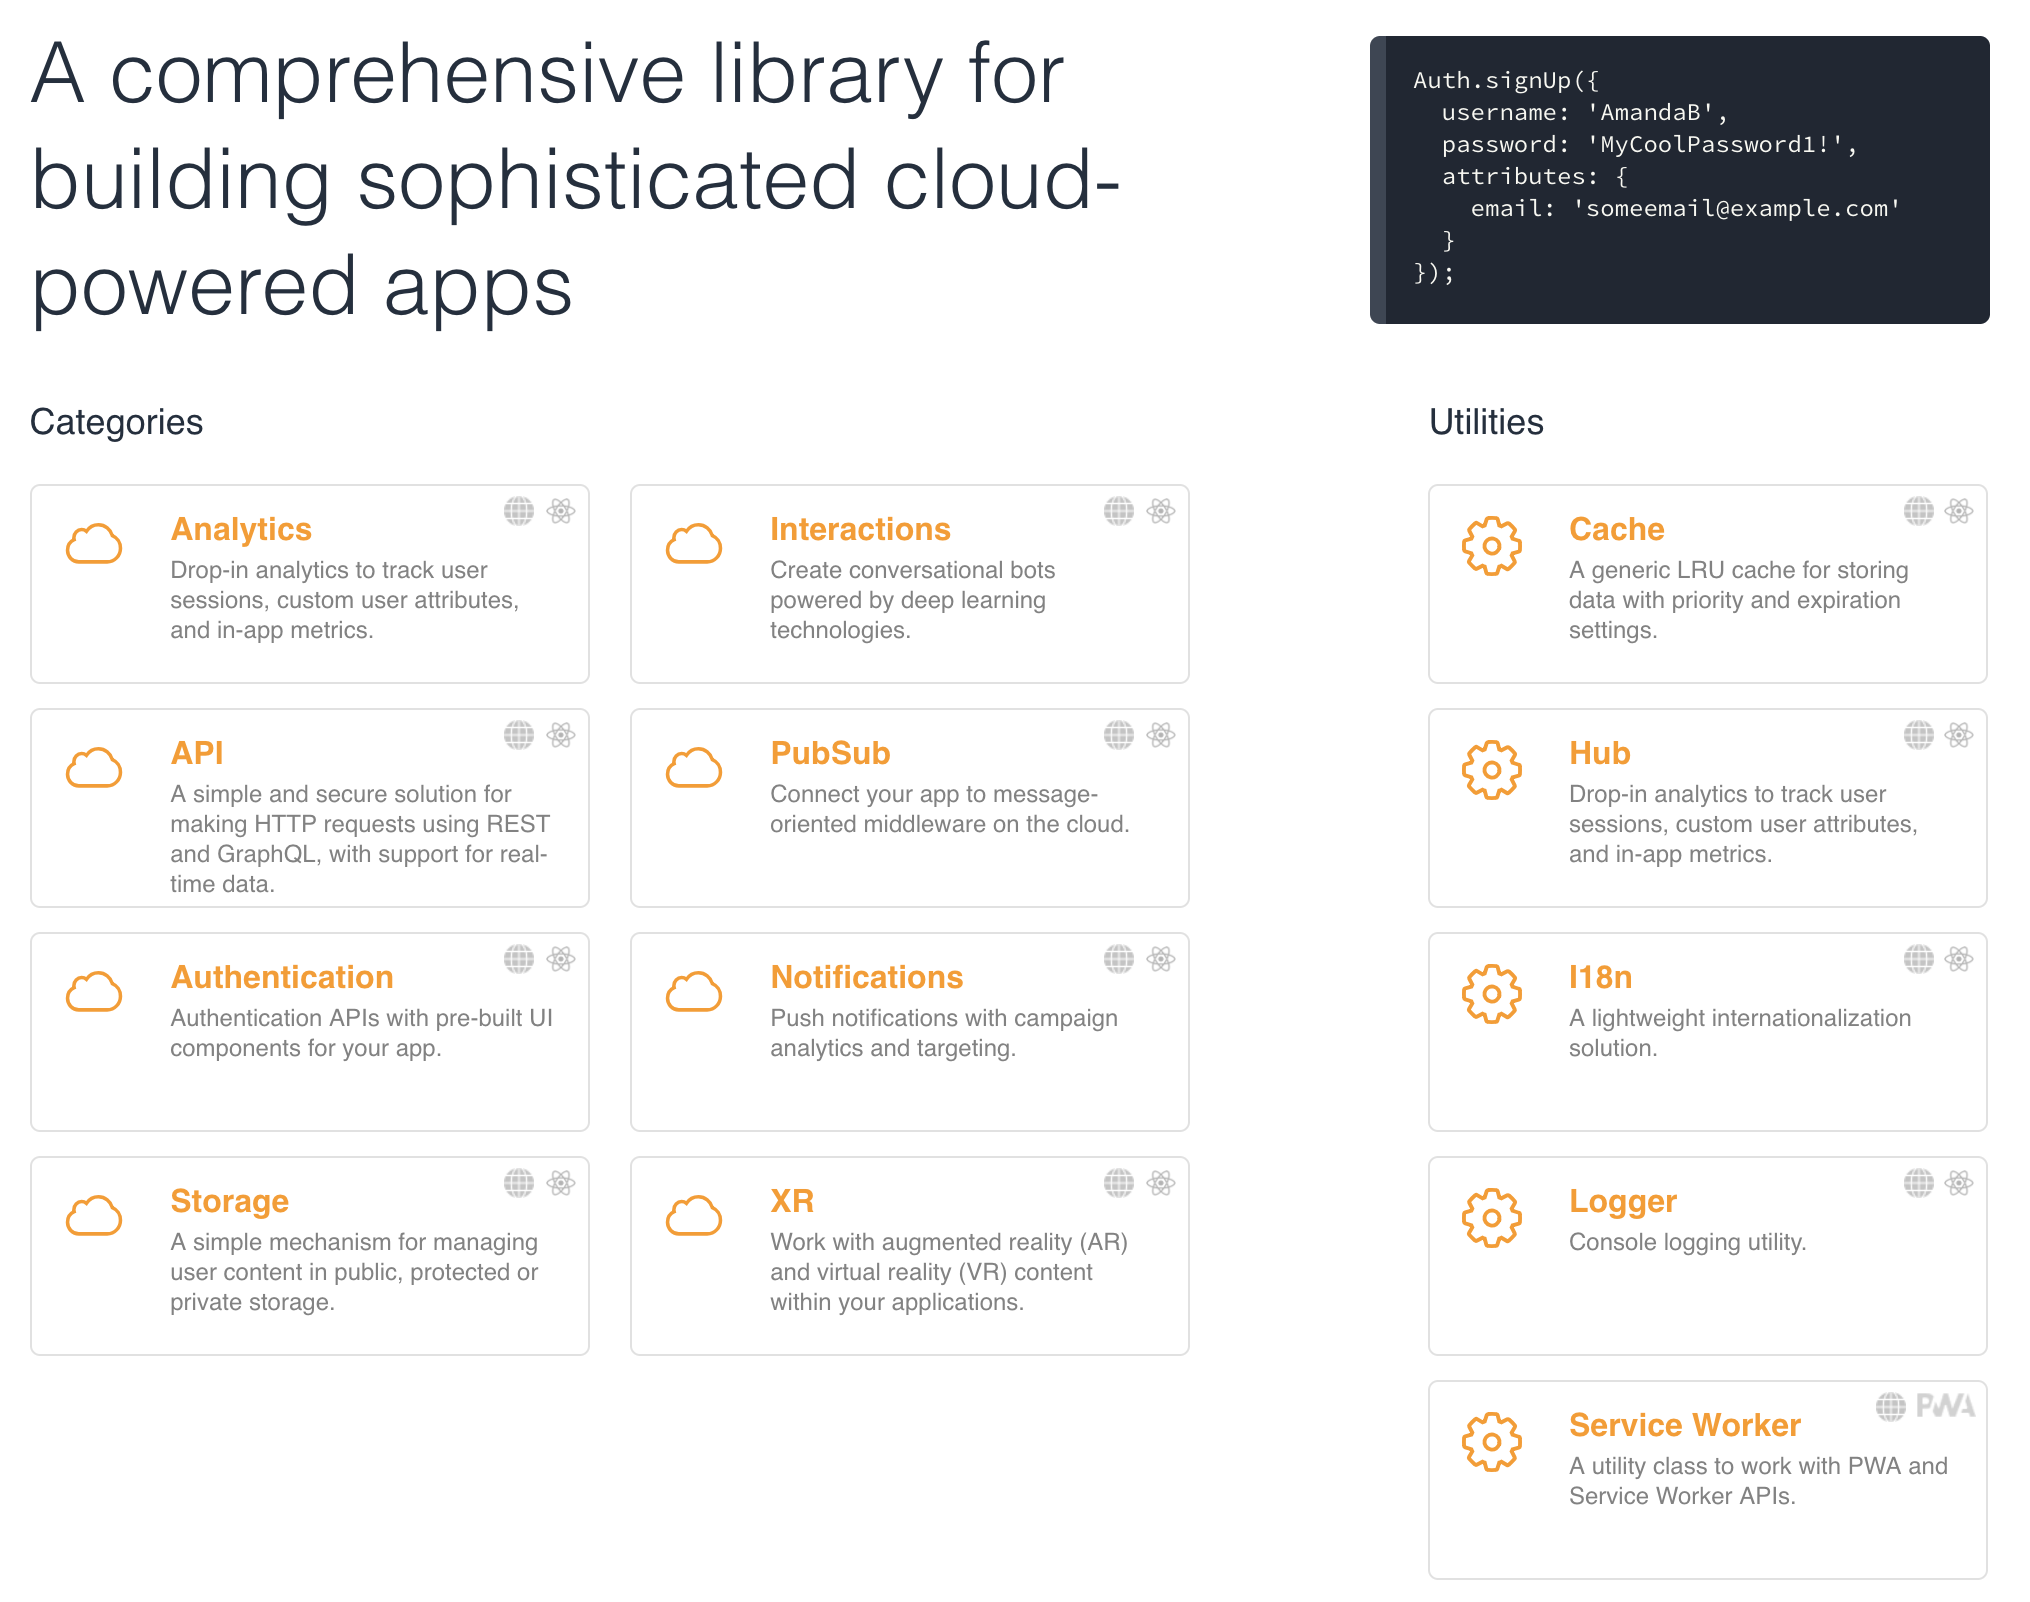
AWSが提供する各サービスとの連携をできるようにするライブラリです。
JavaScript、iOS, Android, React Native をサポートしています。
https://aws-amplify.github.io/
CLIのインストール
$ npm install -g @aws-amplify/cli
基本的にこれだけです。
Vue プロジェクトの作成
以前はReactとAngularでしたが、Vue でもいけるようになっていたので Vue で試します。
$ vue create amplify-auth-sample
Vue CLI v3.2.1
? Please pick a preset: Manually select features
? Check the features needed for your project: Babel, Router, Linter
? Use history mode for router? (Requires proper server setup for index fallback in production) Yes
? Pick a linter / formatter config: Basic
? Pick additional lint features: Lint on save
? Where do you prefer placing config for Babel, PostCSS, ESLint, etc.? In package.json
? Save this as a preset for future projects? No
Router を追加したくらいです。
Amplify のセットアップ
作成した Vue プロジェクトに追加していきます。
$ amplify init
? Choose your default editor: IDEA 14 CE
? Choose the type of app that you're building javascript
Please tell us about your project
? What javascript framework are you using vue
? Source Directory Path: src
? Distribution Directory Path: dist
? Build Command: npm run-script build
? Start Command: npm run-script serve
Using default provider awscloudformation
For more information on AWS Profiles, see:
https://docs.aws.amazon.com/cli/latest/userguide/cli-multiple-profiles.html
? Do you want to use an AWS profile? Yes
? Please choose the profile you want to use XXX
既に作成済みのプロファイルがあれば、選択するだけで作成されます。
CREATEINPROGRESS amplifyauthsample-20181224180540 AWS::CloudFormation::Stack Mon Dec 24 2018 18:05:41 GMT+0900 (JST) User Initiated
CREATEINPROGRESS DeploymentBucket                 AWS::S3::Bucket            Mon Dec 24 2018 18:05:45 GMT+0900 (JST)
CREATEINPROGRESS AuthRole                         AWS::IAM::Role             Mon Dec 24 2018 18:05:45 GMT+0900 (JST)
CREATEINPROGRESS UnauthRole                       AWS::IAM::Role             Mon Dec 24 2018 18:05:45 GMT+0900 (JST)
CREATEINPROGRESS UnauthRole                       AWS::IAM::Role             Mon Dec 24 2018 18:05:46 GMT+0900 (JST) Resource creation Initiated
CREATEINPROGRESS AuthRole                         AWS::IAM::Role             Mon Dec 24 2018 18:05:46 GMT+0900 (JST) Resource creation Initiated
CREATEINPROGRESS DeploymentBucket                 AWS::S3::Bucket            Mon Dec 24 2018 18:05:47 GMT+0900 (JST) Resource creation Initiated
⠋ Initializing project in the cloud...
CREATECOMPLETE UnauthRole AWS::IAM::Role Mon Dec 24 2018 18:06:03 GMT+0900 (JST)
CREATECOMPLETE AuthRole AWS::IAM::Role Mon Dec 24 2018 18:06:04 GMT+0900 (JST)
CREATECOMPLETE DeploymentBucket AWS::S3::Bucket Mon Dec 24 2018 18:06:07 GMT+0900 (JST)
CREATECOMPLETE amplifyauthsample-20181224180540 AWS::CloudFormation::Stack Mon Dec 24 2018 18:06:11 GMT+0900 (JST)
✔ Successfully created initial AWS cloud resources for deployments.
Your project has been successfully initialized and connected to the cloud!
Some next steps:
"amplify status" will show you what you've added already and if it's locally configured or deployed
"amplify add" will allow you to add features like user login or a backend API
"amplify push" will build all your local backend resources and provision it in the cloud
"amplify publish" will build all your local backend and frontend resources (if you have hosting category added) and provision it in the cloud
Pro tip:
Try "amplify add api" to create a backend API and then "amplify publish" to deploy everything
次に auth を追加しましょう。
$ amplify add auth
Do you want to use the default authentication and security configuration? No, I will set up my own configuration.
? Select the authentication/authorization services that you want to use: User Sign-Up & Sign-In only (Best used with a cloud API only)
? Multifactor authentication (MFA) user login options: OFF
? Email based user registration/forgot password: Enabled (Requires per-user email entry at registration)
? Please specify an email verification subject: Your verification code
? Please specify an email verification message: Your verification code is {####}
? Do you want to override the default password policy for this User Pool? Yes
? Enter the minimum password length for this User Pool: 8
? Select the password character requirements for your userpool: Requires Lowercase, Requires Uppercase, Requires Numbers
? Specify the app's refresh token expiration period (in days): 30
? Do you want to specify the user attributes this app can read and write? No
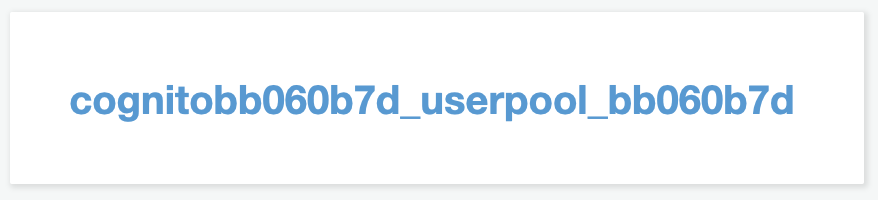
Successfully updated resource cognitobb060b7d locally
Some next steps:
"amplify push" will build all your local backend resources and provision it in the cloud
"amplify publish" will build all your local backend and frontend resources (if you have hosting category added) and provision it in the cloud
初期設定で良ければ、最初を Yes にしてしまえば終わりですが、
パスワードポリシーが結構厳し目なので、シンボルだけ外しました。
 $ amplify status
| Category | Resource name   | Operation | Provider plugin   |
| -------- | --------------- | --------- | ----------------- |
| Auth     | cognitobb060b7d | Create    | awscloudformation |
status で作成できているかを確認できます。
$ amplify push
| Category | Resource name | Operation | Provider plugin |
| -------- | --------------- | --------- | ----------------- |
| Auth | cognitobb060b7d | Create | awscloudformation |
? Are you sure you want to continue? Yes
⠏ Updating resources in the cloud. This may take a few minutes...
(省略)
✔ All resources are updated in the cloud
コンソールを見ると Cognito が作成されていることがわかります。
Vue のパッケージ
npm i aws-amplify
npm i aws-amplify-vue
上記を追加します。
Vue の実装
ちゃんと実装するのはログインステータスを store 等でちゃんと制御できるようにした方が良いのですが、
今回は表示できることに特化しています。
main.js
import Vue from 'vue'
import App from './App.vue'
import router from './router'
import Amplify, * as AmplifyModules from 'aws-amplify'
import { AmplifyPlugin } from 'aws-amplify-vue'
import awsexports from './aws-exports'
Amplify.configure(awsexports)
Vue.use(AmplifyPlugin, AmplifyModules)
Vue.config.productionTip = false
import {AmplifyEventBus} from 'aws-amplify-vue';
AmplifyEventBus.$on('authState', info => {
console.log(Here is the auth event that was just emitted by an Amplify component: ${info})
});
new Vue({
router,
render: h => h(App)
}).$mount('#app')
追加したのは以下の部分です。
import Amplify, * as AmplifyModules from 'aws-amplify'
import { AmplifyPlugin } from 'aws-amplify-vue'
import awsexports from './aws-exports'
Amplify.configure(awsexports)
Vue.use(AmplifyPlugin, AmplifyModules)
import {AmplifyEventBus} from 'aws-amplify-vue';
AmplifyEventBus.$on('authState', info => {
console.log(Here is the auth event that was just emitted by an Amplify component: ${info})
});
router.js
import Vue from 'vue'
import Router from 'vue-router'
import Home from './views/Home.vue'
import { components } from 'aws-amplify-vue'
Vue.use(Router)
export default new Router({
mode: 'history',
base: process.env.BASE_URL,
routes: [
{
path: '/',
name: 'home',
component: Home
},
{
path: '/about',
name: 'about',
// route level code-splitting
// this generates a separate chunk (about.[hash].js) for this route
// which is lazy-loaded when the route is visited.
component: () => import(/* webpackChunkName: "about" */ './views/About.vue')
},
{
path: '/auth',
name: 'auth',
component: components.Authenticator
}
]
})
こちらも追加したのは以下の部分です。
import { components } from 'aws-amplify-vue'
routes: [
{
path: '/auth',
name: 'auth',
component: components.Authenticator
}
]
これだけ追加して実行します。
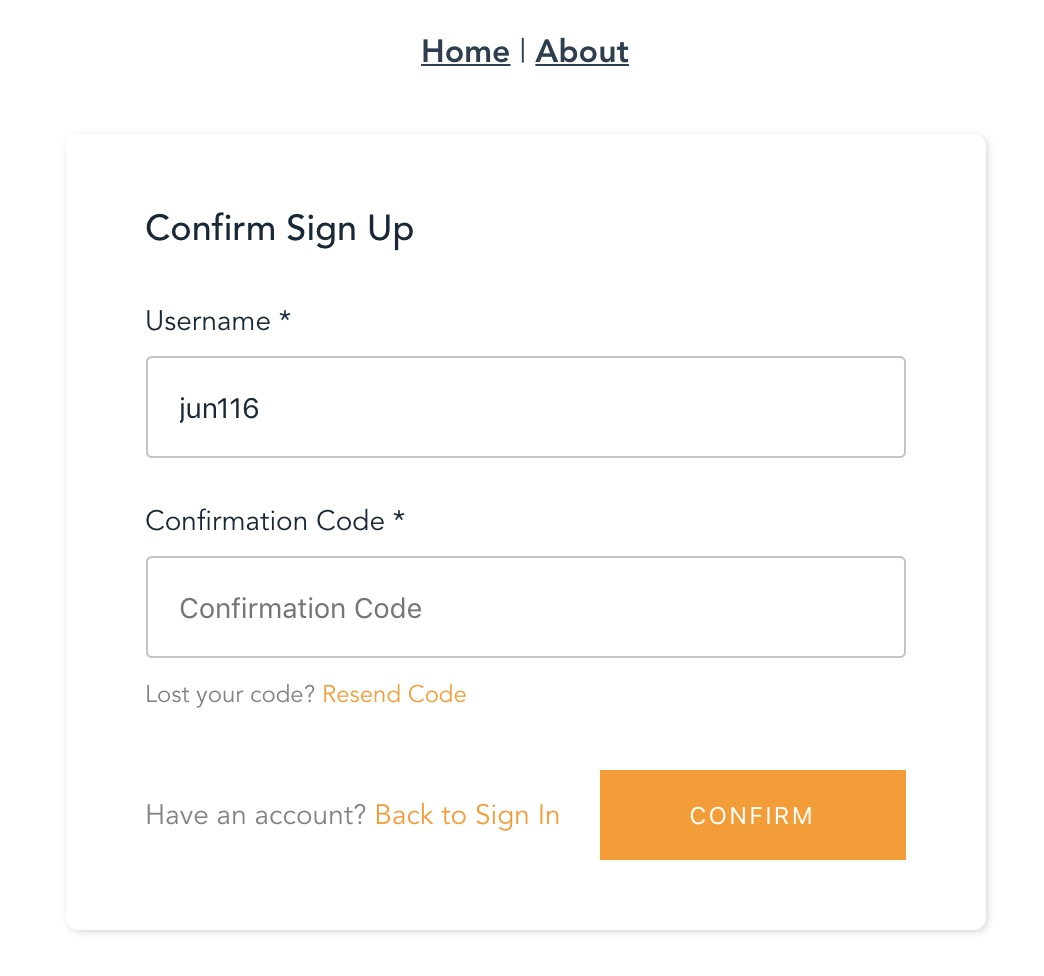
http://localhost:8080/auth
にアクセスするとサインイン画面が表示されます。
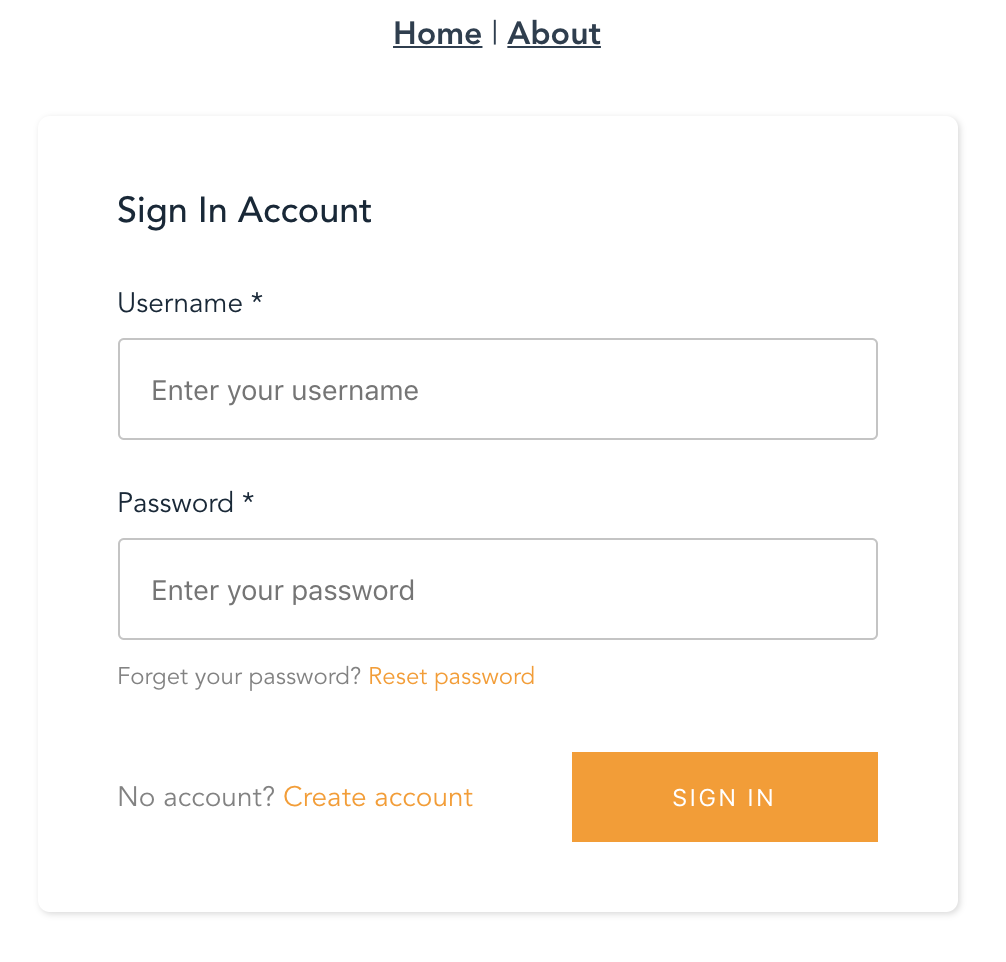
No account? Create account で登録してみましょう
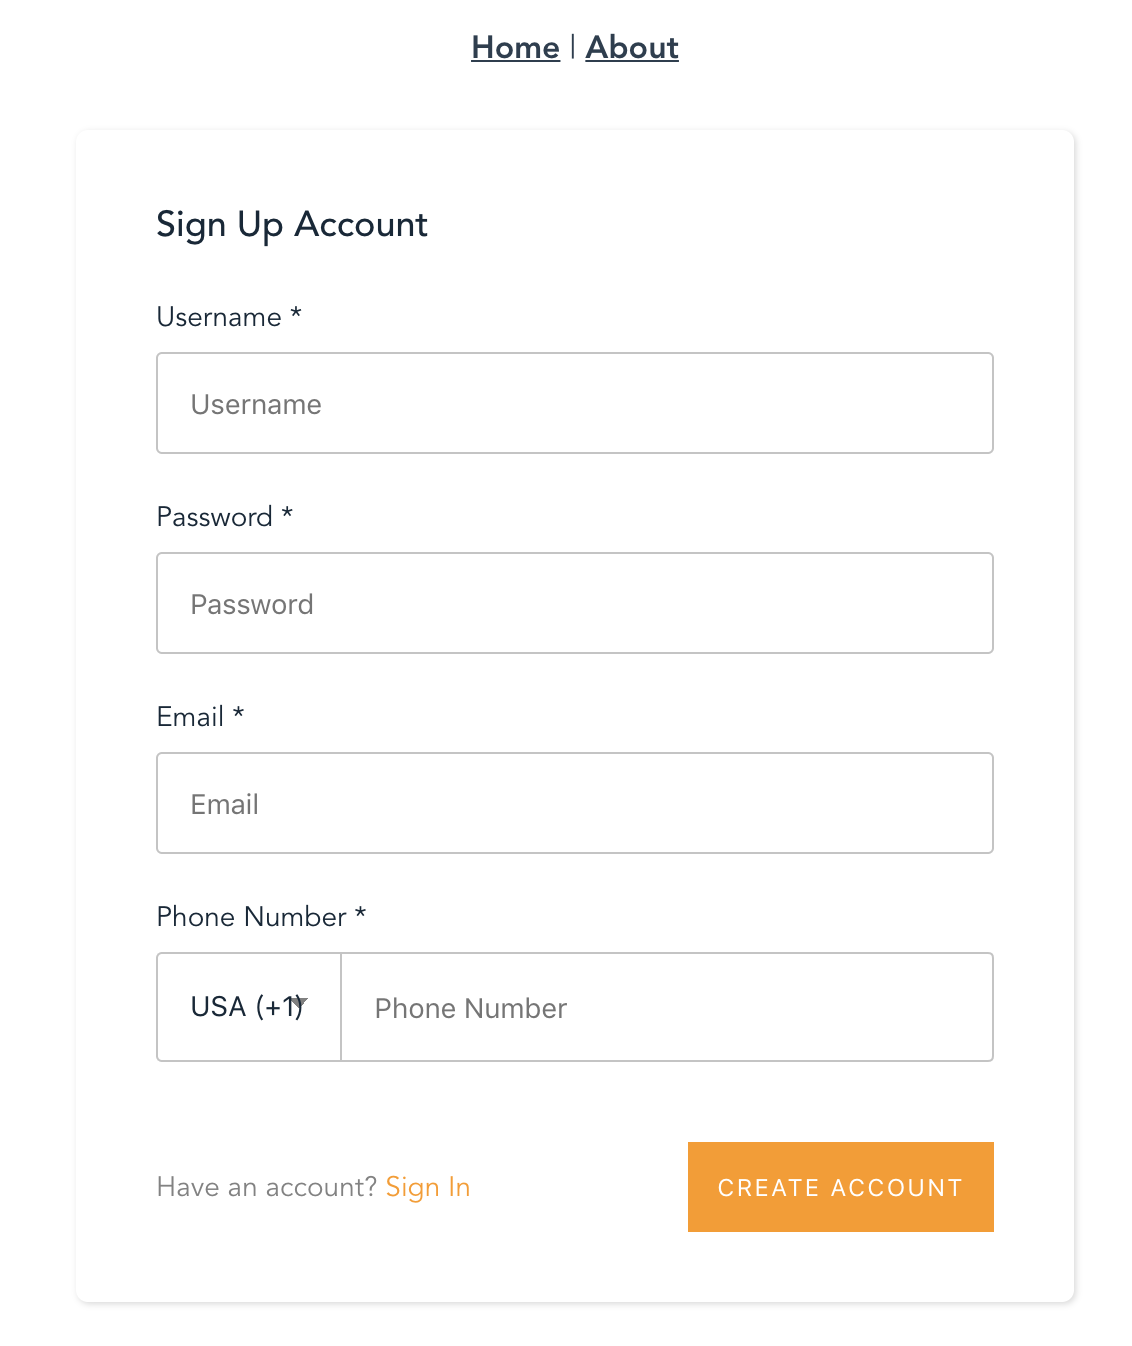
コンファーム画面に進んで、登録したメールに verification code が届きます。
登録完了して、ログインできるようになりました。
Cognitoに登録されていることも確認できました。

どうでしょうか。
これだけで会員登録周りが簡単にできますね。
他にもAPIで AppSync を利用して GraphQL を追加したりもできます。
AWS Amplify は日々新しい機能が追加されていたりもしますので、ウォッチしていきたいと思います。